How to set up parental controls on Nintendo Switch
Discover detailed steps to design the perfect parental controls on your Nintendo Switch—ensuring safe playtime and content access for your child.


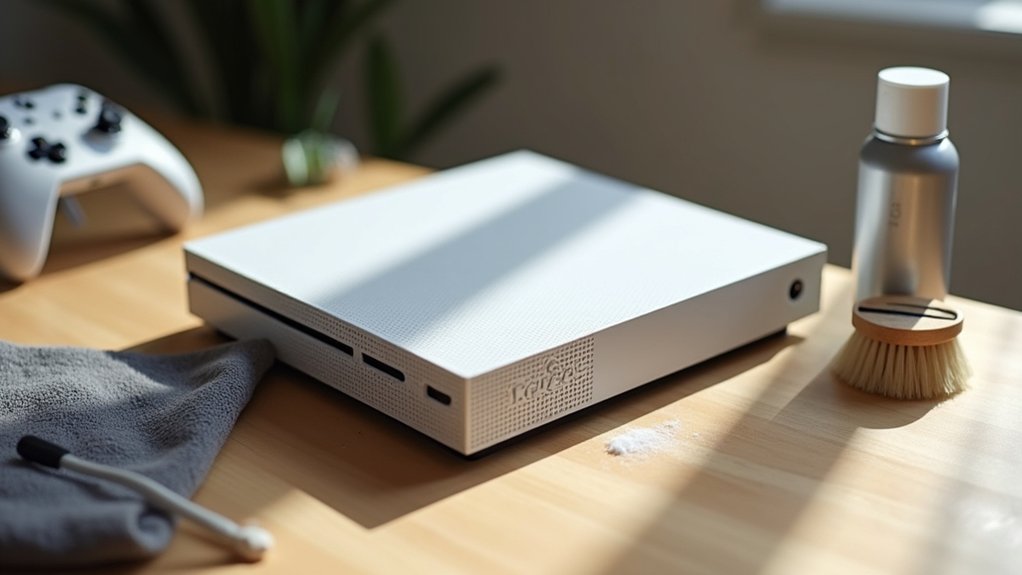
Maintaining a clean Xbox Series S is essential for top performance and long-term reliability. Dust buildup can cause overheating, fan noise, and even hardware issues if ignored. Cleaning your console goes beyond a quick wipe—your Xbox Series S needs careful attention to both vents and surfaces to keep airflow strong and temperatures low. With the right tools and gentle methods, you can protect your Xbox Series S without risking damage. Follow these simple steps to keep your console dust-free and gaming smoothly.

Cleaning an Xbox Series S is simple when you have the right tools: compressed air, microfiber cloths, isopropyl alcohol (at least 70%), and the appropriate screwdriver bits.
Always unplug the console from the mains before cleaning your Xbox Series S to stay safe and protect internal components.
With proper prep and gentle techniques, cleaning your Xbox Series S helps maintain cooling performance, reduce dust buildup, and prevent damage—keeping your gaming sessions smooth and your console running like new.
If you’re learning how to clean your Xbox Series S, the right tools make a big difference. For safe dust removal, use compressed air to clear vents and ports, and a microfiber cloth to gently wipe the exterior without scratching.
Apply a small amount of isopropyl alcohol to the microfiber cloth to disinfect buttons and surfaces. A low-powered vacuum can help pull out stubborn dust from grills, but avoid high suction to protect internal components.
For deeper maintenance, T8 and T10 screwdrivers are useful for opening the console carefully. These recommended cleaning supplies help keep your Xbox Series S running cool, quiet, and ready for gaming.
Before beginning any maintenance on the Xbox Series S, make sure the Xbox Series S is completely powered off and unplugged from the mains to prevent electrical hazards.
Use the right tools for the job, including T8 and T10 screwdrivers, compressed air, microfiber cloths, and isopropyl alcohol.
Work on a clean, stable surface—avoid carpets or rugs—to reduce static and dust while cleaning your Xbox Series S, keeping your gaming setup safe and running smoothly.
Before cleaning the Xbox Series S, always power down and unplug your Xbox Series S to ensure safety.
Remove all external accessories from your Xbox Series S, like controllers, cables, and storage devices, to get clear access to every surface.
These simple steps help prepare the console properly for effective cleaning and better long-term performance.
When cleaning your Xbox Series S, start by powering down and unplugging the console to keep your device safe.
First, hold the power button to shut it off completely so all processes stop. Then, unplug the console from the mains to eliminate any electrical risk while you work.
This simple step protects both you and your Xbox Series S, and it helps ensure better longevity for your gaming setup.
Place the console on a stable, clean surface before continuing to clean your Xbox Series S.
After powering down and unplugging the Xbox Series S, remove all external accessories to prepare for cleaning.
Detach controllers, external storage drives, and any HDMI or power cables connected to your Xbox Series S.
Taking off these accessories gives you clear access to the console’s ports and vents, helping you clean your Xbox Series S safely without risking damage to connected components.
Keeping your Xbox Series S clean helps it run smoothly and look great.
To clean the exterior of your Xbox Series S, gently clear dust from the vents and ports using a soft brush or a low-powered vacuum to prevent buildup that can affect airflow.
Next, wipe the surface of your Xbox Series S and its controller with a slightly damp microfiber cloth or a safe disinfectant wipe to remove smudges and germs.
Regular maintenance like this keeps your console performing well and ready for gaming.
Cleaning the vents and ports of the Xbox Series S is essential for gamers who want smooth performance and long console life.
Regularly cleaning the vents and ports helps maintain optimal airflow, reduces overheating, and prevents dust buildup that can slow down your gaming sessions.
Use compressed air or a low-powered vacuum to remove dust, and a soft brush to gently loosen stubborn particles.
Always power off and unplug your Xbox Series S before cleaning the vents and ports to avoid electrical hazards and protect your hardware.
Wipe down the exterior surfaces of the Xbox Series S and its controller using a damp microfiber cloth or pre-moistened disinfectant wipes to remove fingerprints, smudges, and germs.
Ensure the console is unplugged before cleaning to protect your Xbox Series S and controller from accidental damage.
For stubborn marks, lightly dampen the cloth with isopropyl alcohol (70% or less), then gently buff the area.
Avoid excess moisture near ports to prevent damage to your Xbox Series S and controller.
Regularly cleaning your Xbox Series S and controller helps maintain performance, keeps your gaming setup looking pro, and supports a better overall gaming experience.
Cleaning the interior of your Xbox Series S can help improve performance and reduce fan noise.
To clean the interior of your Xbox Series S, first power it off, unplug all cables, and carefully open the console by removing the appropriate covers and screws.
Once inside, gently clear dust from vents, the fan, and the heat sink using short bursts of compressed air or a low-powered vacuum with an anti-static brush.
Avoid touching sensitive components and never use liquid cleaners.
After you clean the interior of your Xbox Series S, reassemble it securely and reconnect your cables to get back to gaming.
If you’re opening the console safely on an Xbox Series S, follow these steps to protect your hardware.
First, unplug the console from the mains to avoid any electrical risk.
For opening the console safely, remove the two white covers at the back near the connection ports, then use a T8 screwdriver to unscrew the hidden screws.
Next, gently lift and detach the outer casing, carefully separating it from the chassis before proceeding with internal cleaning.
Once the console casing is safely removed, you can start removing dust from internal components to keep your Xbox Series S running smoothly.
Use short bursts of compressed air to clear dust from the motherboard, fan, and vents, or carefully use a low-powered vacuum with a brush attachment.
When removing dust from internal components, avoid touching delicate parts, keep the fan from spinning freely while you clean, and work in a well-ventilated area to maintain performance and extend the life of your gaming hardware.
Reassembling your Xbox Series S is a key step to get back to gaming quickly and safely.
Start by aligning all internal components and the casing in their original positions, keeping track of where each part belongs in your Xbox Series S.
Use the correct T8 and T10 screwdriver bits to secure every screw—tighten them firmly but avoid over-torquing to protect your Xbox Series S hardware.
Reattach the white covers over the connection ports, check that all parts fit snugly, and make sure there are no gaps or loose pieces before plugging the console back into the mains.
Once everything is set, you’ll be ready to dive back into your favorite games.
Keep your Xbox Series S running smoothly with simple maintenance. To clean your Xbox Series S safely, unplug the console first, then use a soft brush and a microfiber cloth to remove dust from the vents and exterior. For a deeper clean, carefully target the fan and ports without opening the device, as that can void warranties. By cleaning your Xbox Series S regularly, you can prevent overheating, avoid performance dips, and extend your console’s lifespan—keeping your gaming sessions fast, quiet, and hassle-free. Regular care is a small step that brings big benefits for gamers.

Discover detailed steps to design the perfect parental controls on your Nintendo Switch—ensuring safe playtime and content access for your child.

Discover the key differences between the Nintendo Switch OLED and regular Switch that could redefine your gaming experience—find out which truly stands out.

Boost your Nintendo Switch storage with simple steps and smart choices, but did you know there’s more to expanding space than just adding a microSD card?

Properly transferring data between Nintendo Switch consoles ensures your games and progress stay intact—discover the essential steps to make it seamless today.

Never let Joy-Con drift ruin your game again—discover essential tips and surprising fixes to restore precise control on your Nintendo Switch today.

Need to add friends on Nintendo Switch? Discover simple steps and hidden tips to connect with players worldwide and enhance your gaming experience.