Charging a Nintendo Switch controller isn’t the same for every model, and missing one small detail could leave you stuck mid-game. Whether you’re using Joy-Cons, a Pro Controller, or a third-party option, knowing the right method makes all the difference…
Understanding different types of Nintendo Switch controllers
Nintendo Switch controllers come in several variations, each designed to suit different gaming preferences and scenarios.
Controllers like the Joy-Con feature detachable, motion-sensing parts ideal for multiplayer sessions and flexible play styles.
In contrast, the Pro Controller offers a traditional, ergonomic design with enhanced battery life and responsive buttons, catering to players seeking a more conventional gaming experience.
Both Nintendo Switch controllers require specific charging methods, so using the right cable or charging dock helps keep your setup ready for long gaming sessions.
Charging Joy-Con controllers using the Nintendo Switch Console
Simply slide each Joy-Con onto the console’s side rails, and charging begins automatically. This approach doesn’t require extra accessories, making it perfect for quick top-ups between gaming sessions.
For best results, make sure the Nintendo Switch console is connected to power so your Joy-Con controllers charge efficiently.
If you’re on the go, docking the Nintendo Switch console or plugging it in ensures your Joy-Con controllers stay ready for your next game.
Using the Joy-Con charging grip for convenient charging
The Joy-Con Charging Grip is a smart accessory for Nintendo Switch players who want comfort and constant power. While charging Joy-Con controllers on the console is simple, the Joy-Con Charging Grip lets you play with a classic controller feel while both Joy-Con charge at the same time.
This means longer gaming sessions, fewer pauses, and an ergonomic design that keeps your hands comfortable.
For gamers who value uninterrupted gameplay, the Joy-Con Charging Grip delivers. It supports simultaneous charging, offers solid Joy-Con compatibility, and fits naturally in your hands during intense matches.
If you want a reliable setup for continuous play, the Joy-Con Charging Grip is an easy upgrade for your Nintendo Switch.
Charging the Nintendo Switch Pro controller with a USB cable
Charging the Nintendo Switch Pro Controller with a USB cable is an easy way to keep playing without worrying about battery life.
Most models use a USB-C connection, which supports standard USB specs for quick, reliable power.
To charge the Nintendo Switch Pro Controller efficiently, plug the USB cable into a compatible wall charger or the Nintendo Switch dock’s USB port.
This setup lets you top up the battery between matches—or even while you play—so your Nintendo Switch Pro Controller is always ready for your next gaming session.
Utilizing a Charging Dock for Multiple Controllers
A charging dock for multiple Nintendo Switch controllers is a simple, tidy way to keep your gear ready to play.
With a charging dock for multiple controllers, you can power several devices at once, cut down on cable clutter, and keep your gaming area organized.
It also helps with multiple controller organization by holding each controller securely in one place, making it easy to dock and grab when it’s game time.
For families, party gaming, or anyone with extra Joy-Cons and gamepads, a charging dock for multiple controllers is a smart, time-saving upgrade.
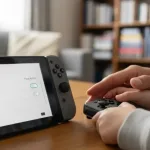
Indicators for battery level and charging status
Understanding the indicators for battery level and charging status on Nintendo Switch controllers helps you keep gameplay smooth and uninterrupted.
On the console, battery indicators show the current charge levels for each controller, so you’ll know when it’s time to plug in.
Meanwhile, charging status lights on Joy-Con, the Pro Controller, or the charging dock signal whether charging is active or the battery is full.
Tips for extending battery life of your Nintendo Switch controllers
To maximize the usability of your Nintendo Switch controllers, adopting simple battery-saving habits can make a big difference.
Regular battery care, like avoiding complete discharge and charging before they hit 0%, helps extend overall lifespan.
Adjusting settings on your Nintendo Switch controllers, such as lowering vibration intensity and turning down screen brightness when possible, reduces power draw.
Finally, remember to turn your Nintendo Switch controllers off when not in use to prevent idle drain.
These easy tips help you get longer play sessions between charges and keep your controllers performing smoothly.
Troubleshooting common charging issues
If your Nintendo Switch controller won’t charge, don’t worry, most problems are easy to fix. A Nintendo Switch controller not charging often comes down to a bad cable or a dirty charging port.
First, check that the USB-C cable isn’t frayed and is firmly connected to both the controller and the dock or adapter.
Next, gently clean the charging contacts with a soft, dry brush or compressed air to remove dust and debris.
These quick steps often get a Nintendo Switch controller charging again so you can jump back into your favorite games.
Recommended accessories for charging Nintendo Switch controllers
If you’re looking to keep your setup simple and efficient, the best accessories for charging Nintendo Switch controllers can make a big difference.
Wireless chargers let you power up without cables, cutting clutter and making it easy to drop controllers in place after a gaming session.
Charging stands are another great option for charging Nintendo Switch controllers, securely holding Joy-Con and Pro Controllers while powering multiple devices at once.
With these accessories for charging Nintendo Switch controllers, you’ll keep batteries topped up and your gear ready to play, without constant plugging and unplugging.
Safety precautions while charging your controllers
To keep your Nintendo Switch controllers safe and performing well, follow these simple charging tips.
When charging the controllers, avoid placing them on flammable surfaces and ensure there’s good ventilation to prevent overheating.
Always use official or certified chargers designed for Nintendo Switch controllers to reduce the risk of damage or malfunction.
Finally, unplug them once fully charged to support long-term battery health and minimize any potential hazards during prolonged charging.
Conclusion
Charging Nintendo Switch controllers is simple once you know the options available. To charge Nintendo Switch controllers like the Joy-Cons, slide them onto the console while it’s docked or use a Joy-Con charging grip. For the Pro Controller, plug it into a power source with a USB-C cable. If you have multiple gamepads, consider a charging dock to keep everything organized and ready to play. Remember, proper charging habits—like avoiding extreme temperatures and unplugging once fully charged, help extend battery life. By learning how to charge Nintendo Switch controllers efficiently, you’ll enjoy smooth, uninterrupted gaming sessions.
Amanda Torati is a linguist and postgraduate researcher who specializes in the intersection of storytelling and interactive media. With a deep fascination for the gaming ecosystem, she focuses on deconstructing game narratives and technical trends to make them accessible to players of all levels. At ABWaves Game, Amanda combines her academic background with in-depth research to deliver reviews and guides that are both precise and engaging, ensuring readers stay informed in a fast-paced digital world.